How to Record GTA 6 on PS5 and Xbox Series X Without a PC
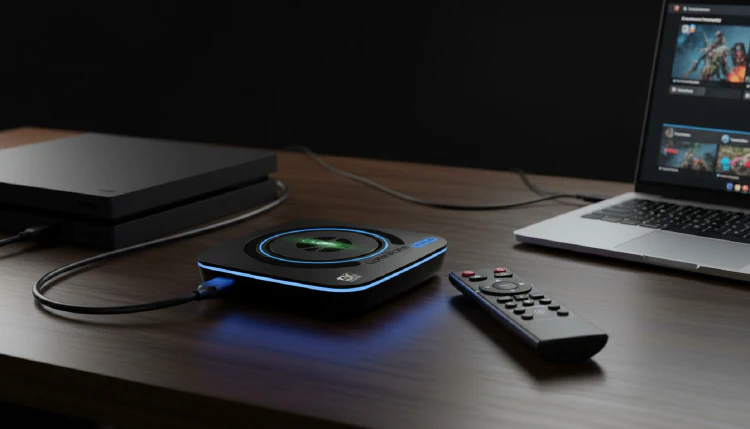
GTA 6 came out on November 19, 2026 for PlayStation 5 and Xbox Series X|S. If you want to keep whole play sessions on a USB drive without a computer, you can put a standalone recorder between the console and your TV.
This guide uses ClonerAlliance UHD Halo, which records HDMI video at up to 4K@60fps straight to a USB drive or TF card. It covers PS5 and Xbox Series X.
What you need
- A PS5 or Xbox Series X
- ClonerAlliance UHD Halo (one HDMI cable is in the box)
- A second HDMI cable, so you have one from the console to UHD Halo and one from UHD Halo to the TV. A good-quality HDMI 2.0 cable is recommended for both
- A USB 3.0 storage device: a USB 3.0 SSD is the best choice for long sessions. A storage device is not included
- Your TV
Step 1: Connect the console, UHD Halo and your TV
- Connect the console’s HDMI OUT to HDMI IN on UHD Halo.
- Connect HDMI OUT on UHD Halo to your TV.
- Plug the USB storage device into the USB 3.0 port on UHD Halo.
When UHD Halo detects the console’s signal, the HALO ring on top turns green. When it recognizes the USB device, the side LED turns green.
You keep playing on the TV as usual. The picture passes through UHD Halo at up to 4K@60fps with less than 50ms latency. Play from the TV connected to HDMI OUT.
Full diagram and other setups: Connection guide for ClonerAlliance UHD Halo.
Step 2: Set the console’s video output to 4K, 60Hz and SDR
For the best result, set these in the console’s video output settings:
- Resolution: 4K
- Refresh rate: 60Hz. UHD Halo accepts up to 4K@60fps. A 4K@120Hz signal is not supported, and UHD Halo may show “No Signal”. See How to record 4K@120fps sources.
- HDR: off. UHD Halo records in SDR. With the console set to 4K, 60Hz and SDR, the recorded file is 4K@60fps. More on this in Does ClonerAlliance UHD Halo support HDR?
Everything else can stay at the console’s default settings.
Step 3: Prepare the drive
- Format it as exFAT (NTFS also works). On FAT32, each file is limited to 4GB, so a long session is saved as many small files.
- Set File Size to Unlimited in the UHD Halo menu (Menu → Record Settings → File Size) so a long session isn’t split into segments. This needs exFAT or NTFS.
- Use 128GB or more for 4K recording.
Step 4: Choose the recording settings
In the UHD Halo menu:
| Setting | Recommended for console gameplay |
|---|---|
| Recording resolution | 4K@60fps |
| Video bitrate | 36Mbps for a balance of quality and file size, 50Mbps for the highest quality (options: 8 / 16 / 24 / 36 / 50Mbps) |
| Video codec | H.264 for the best compatibility. H.265 makes smaller files if your player or editor supports it |
Step 5: Record
- Press REC on UHD Halo or on the remote control. The side LED starts flashing green while it records.
- Play as usual.
- Press REC again to stop.
Don’t unplug the USB device while it is recording. The file may be incomplete or corrupted.
How much space does a session take?
| Bitrate | Write speed | Per hour | A 2-hour session |
|---|---|---|---|
| 36Mbps | about 4.5MB/s | about 16GB | about 32GB |
| 50Mbps | about 6.25MB/s | about 22.5GB | about 45GB |
These figures are worked out from the video bitrate. Real files vary a little. Leave some free space on the drive before a long session. For drive types, see Best storage device for 4K@60fps gameplay recording.
Watch the recording
- On the TV, through UHD Halo: press PLAYBACK on the remote, or MENU → Playback. Pick a file from the list. Each file shows its name, length and resolution.
- On a computer: plug the drive into your computer. The files are MP4 (or TS) and are saved in the root folder or the DCIM folder of the drive, depending on your file name settings.
Want to stream or record on a PC at the same time?
UHD Halo can also send the video to a PC over USB-C as a UVC capture device, for OBS Studio and similar software. It keeps recording 4K@60fps to the USB drive at the same time. See How to record videos to PC with ClonerAlliance UHD Halo.
If something doesn’t work
- “No Signal”: check that the console is outputting 60Hz, not 120Hz (Step 2).
- The USB drive isn’t recognized (side LED stays off): see USB device not detected.
- The picture looks washed out: see Why the HDMI output and recorded video look washed out.
Still stuck? Contact our support team.