How to record videos to the USB storage device with ClonerAlliance UHD Lite?
Connect
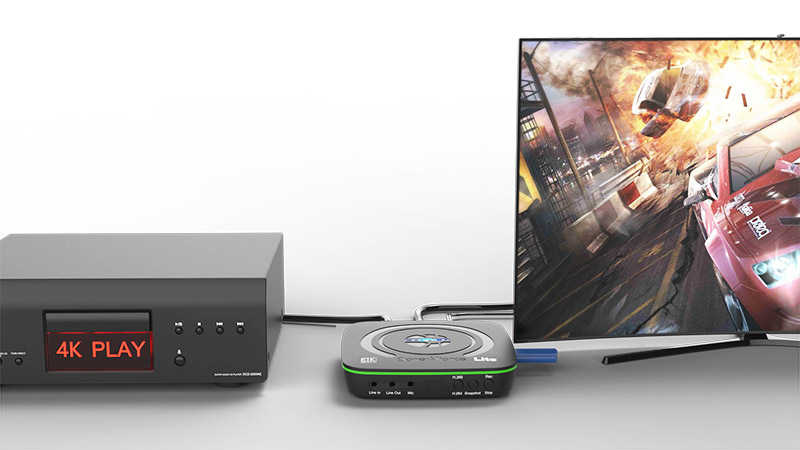
1. Connect the video player to IN port on ClonerAlliance UHD Lite via an HDMI cable.
Connect ClonerAlliance UHD Lite from OUT port to TV via an HDMI cable.
Plug the USB storage device into ClonerAlliance UHD Lite.
4. Plug the power adapter into the power socket and plug the other end into the 5V/2A port of ClonerAlliance UHD Lite.
Power on ClonerAlliance UHD Lite after all devices and cables are well connected.
Tips:
For better user experience, please use a premium USB flash drive or mobile hard disk with high quality to avoid problems caused by disk quality.
Tip: The USB flash drive is not included in the product box. You need to purchase it separately.
Record/Capture
Power on all devices, the video image from the video player will be displayed on TV and the LED will illuminate solid blue or solid green. Solid blue indicates the input signal is 4K and solid green indicates the input signal is 1080p or below. If the top LED is blinking blue and green alternately, that indicates there is no input signal detected.
Before recording, you can easily select H.264 or H.265 by press H.264/H.265 button on the front panel of ClonerAlliance UHD Lite. This option should be done with USB storage device connected to ClonerAlliance UHD Lite.
Press the Rec/Stop button on the capture box, then the LED will blink blue or green, which indicates the capture box is in the process of recording.
Press the Rec/Stop button again on the capture box, then the LED will blink blue/green alternately, which indicates the recorded video is being saved.
When the LED turns solid blue or solid green from blinking blue/green alternately, it indicates the video has been saved successfully. Then you can remove the USB flash drive and play the recorded video on your computer.