How to record videos to the USB storage device with ClonerAlliance ViewPro?
A:
Connect
Connect the video player to IN port on ClonerAlliance ViewPro via an HDMI cable. Note: For AV/VGA/YPbPr source devices, please use the included MMI cable and connect it to the MMI port on ViewPro. After connections, please use the signal buttons on the remote or the “Source” button on ViewPro device to select the correct input signal.
Plug the USB storage device or SD Card into ClonerAlliance ViewPro.
Plug the power adapter into the power socket and plug the other end into the 12V port of ClonerAlliance ViewPro.
Power on ClonerAlliance ViewPro after all devices and cables are well connected.
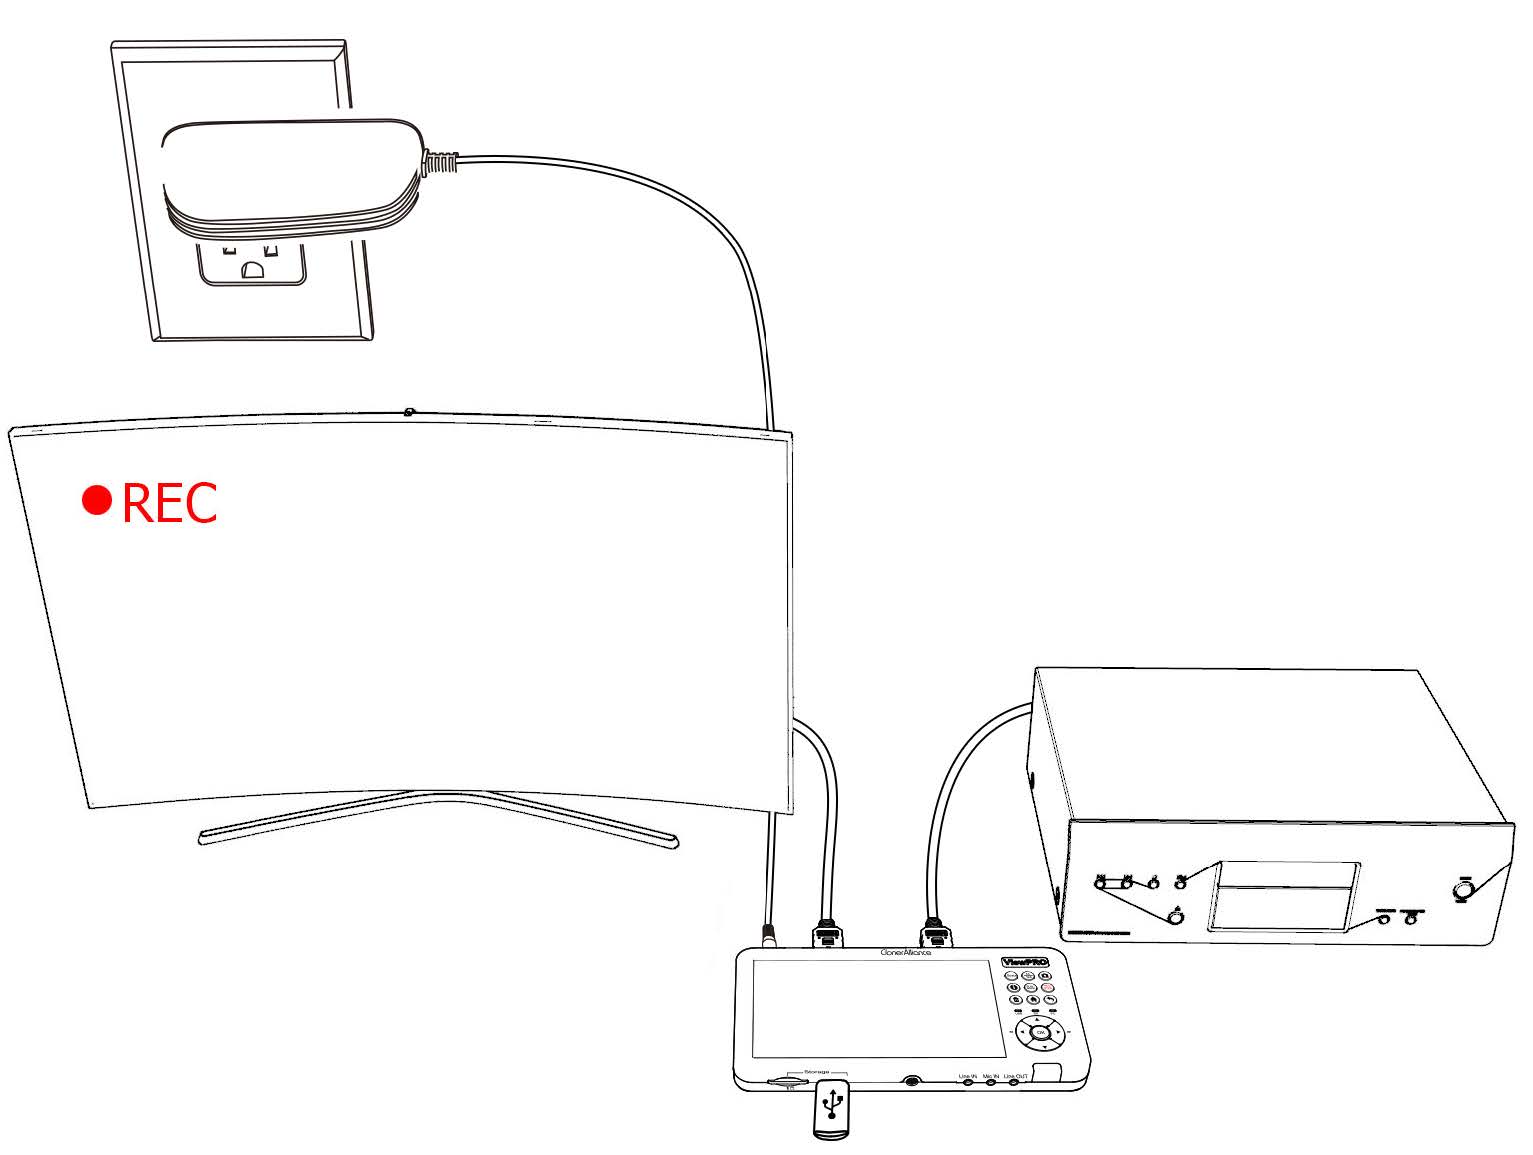
Tips: 1. If you want to monitor the output image on TV, you can connect ClonerAlliance ViewPro from OUT port to TV via an HDMI cable. Please note that the output image will either display on the screen of ClonerAlliance ViewPro or the TV, it can NOT display on both at the same time.
When recording to USB storage devices, please use a premium USB flash drive or mobile hard disk with high speed to avoid unexpected problems such as file loss.
Record videos
You can select to use the function buttons on ClonerAlliance ViewPro to record or use the remote of ClonerAlliance ViewPro to record. Please check out details below.
Record videos with the buttons on ClonerAlliance ViewPro
Power on all devices, the video image from the video player will be displayed on the screen of ClonerAlliance ViewPro. If a TV is connected to the OUT port of ClonerAlliance ViewPro, then the video will be displayed on the TV.
Before recording, please make sure that you have inserted a USB storage device or SD card to ClonerAlliance ViewPro device.
Press the Rec/Stop button on ClonerAlliance ViewPro, then the storage LED will blink blue or green, which indicates ClonerAlliance ViewPro is in the process of recording.
Press the Rec/Stop button again on ClonerAlliance ViewPro, check the status of storage indicators, when the LED turns to solid blue or green, it indicates the videos have been saved.
You can playback the recorded files on ClonerAlliance ViewPro directly or on a PC or on a smart TV.
Record videos with the remote included with ClonerAlliance ViewPro
Power on all devices, the video image from the video player will be displayed on the screen of ClonerAlliance ViewPro. If a TV is connected to the OUT port of ClonerAlliance ViewPro, then the video will be displayed on the TV.
Before recording, please make sure that you have inserted a USB storage device or SD card to ClonerAlliance ViewPro device.
Press the Rec button on the Remote of ClonerAlliance ViewPro, then the storage LED will blink blue or green, which indicates ClonerAlliance ViewPro is in the process of recording.
During recording process, you can adjust the volume of HDMI IN by pressing the volume left/right button on the Remote at any time. If you got Mic connected, you also can adjust the volume of Mic during recording by pressing the volume up/down button on the Remote.
Press the Stop button again on ClonerAlliance ViewPro remote, check the status of storage indicators, when the LED turns to solid blue or green, it indicates the videos have been saved.
You can playback the recorded files on ClonerAlliance ViewPro directly or on PC or on a smart TV.
Note: DO NOT remove the USB storage drive from ClonerAlliance ViewPro in the process of recording (Flashing Blue/Green LED indicates it’ s still in the process of recording.)